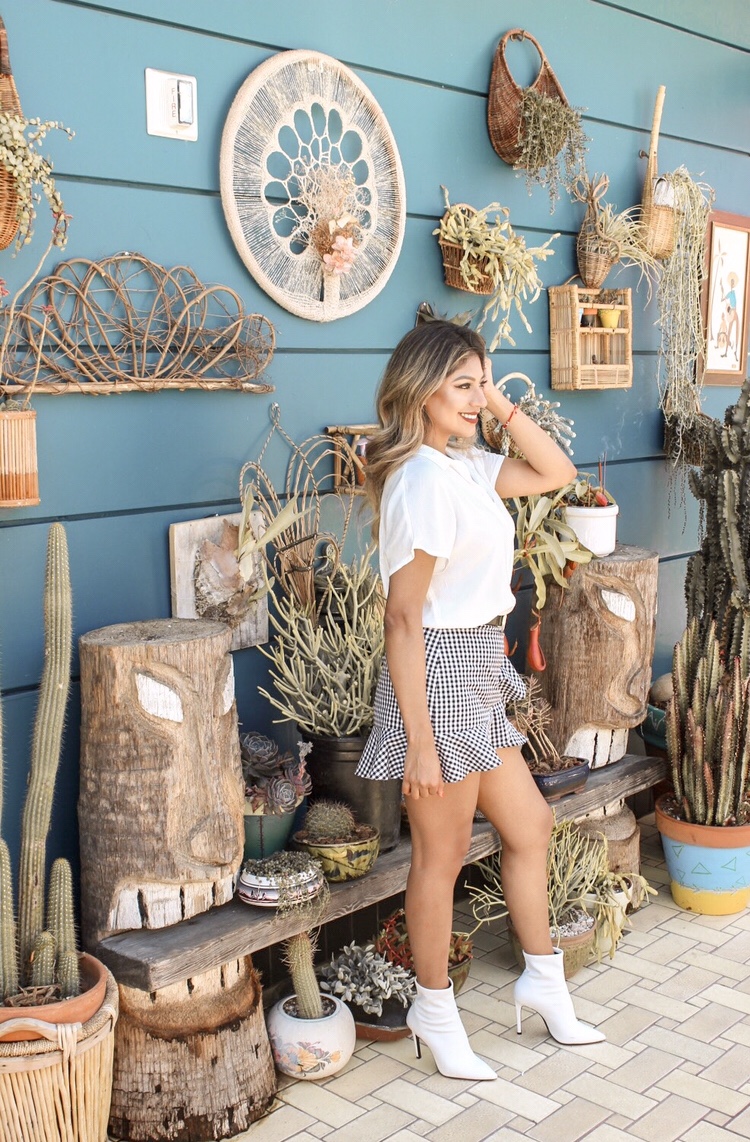
Upgrade Your Photo Editing Skills
Edit pictures like a pro blogger in 6 easy steps using Lightroom CC. Let’s first start by saying I am not a pro blogger hahah far from it. But I have picked up a few skills and knowledge from using many different editing apps and reading many blogs. Today I want to share some of that knowledge with you with the mobile version of Adobe Lightroom CC, my favorite editing app for Instagram pictures. There are many photo editing apps available in the App Store but I do not use any other app as much as Lightroom.
The Reason I Love Lightroom CC
Using Lightroom you can edit everything from Light, Color, Effects, Details, Optics and healing/selective (on paid version). Each of these settings can be edited in order to achieve any particular look. Lately I have been going to a muted-color/warm tone look for my recent pictures. My ultimate favorite option and the reason why I feel like I can edit pictures like a pro is the ability to Copy/paste settings to any picture. The ability to copy/paste allows for a more cohesive and I use this option all the time. It has definitely upgraded my Instagram theme!
How I Edit My Pictures Like a Pro Using Lightroom CC
Let’s get into the step-by-step instructions of how I edit pictures like a pro in 6 easy steps. Once you read how easy it is, I hope you are inspired to work on your pictures for fun and find a color theme you love!
1. Auto:
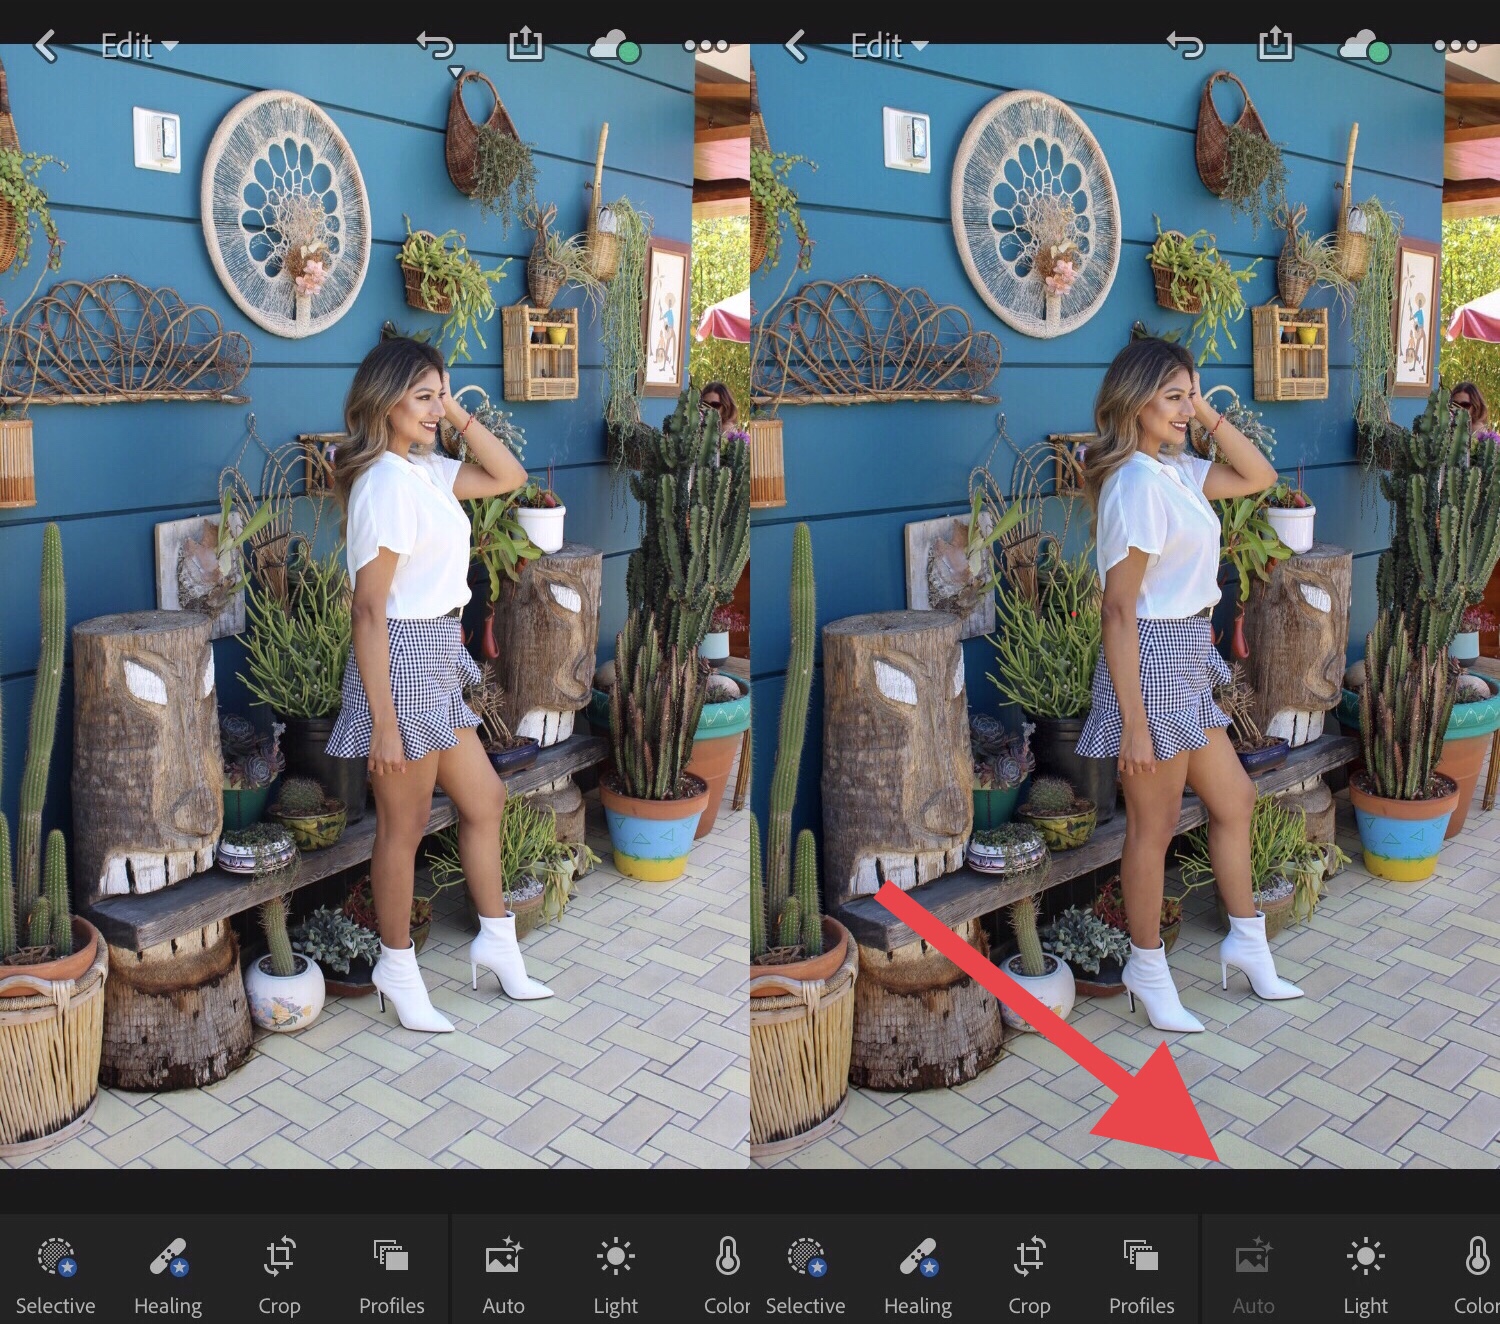
As a first step I like to check the Auto option to see how Lightrooom would edit my picture. I like to do this because it gives me ideas of how my pictures would like with common auto edits. Most days I do not keep the Auto edits on but on occasion I do.
2. Light:
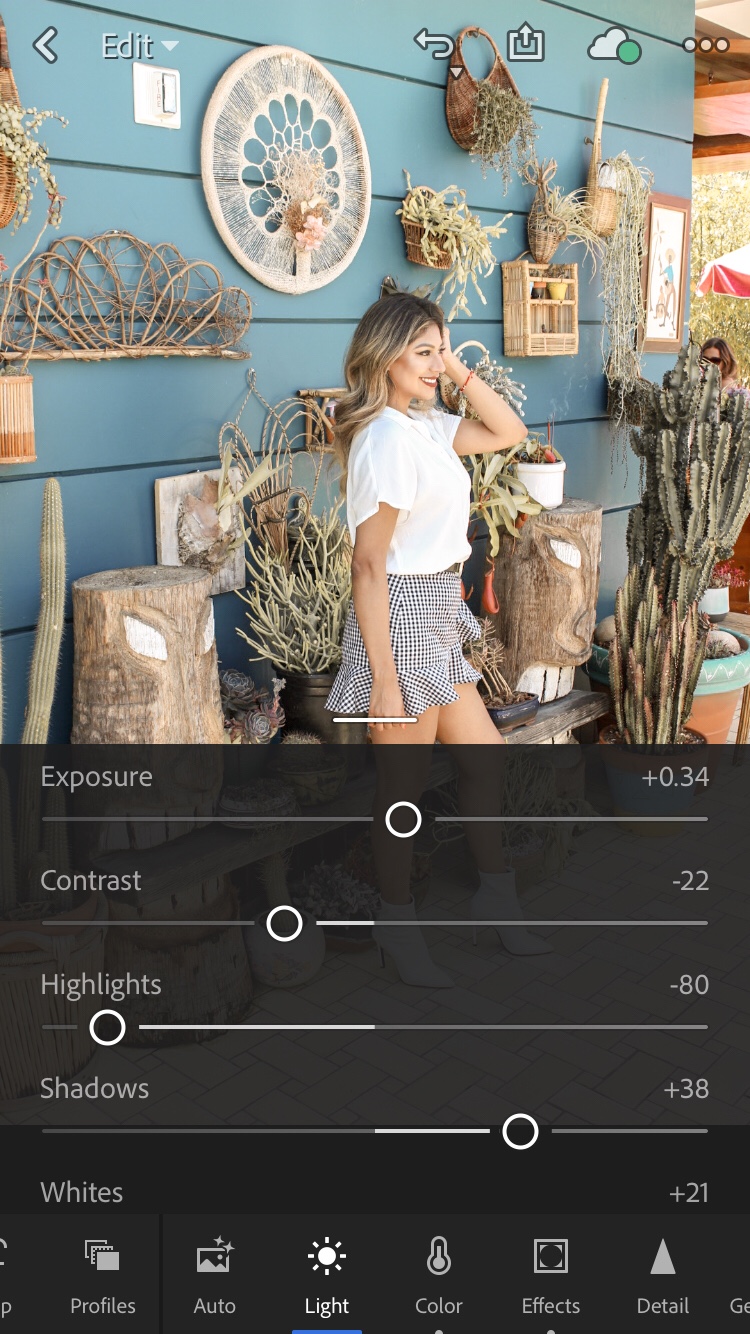
Good lighting IRL will always help your pictures look better but many times we have to work with what we got. I like to raise the Exposure based on how bright my original photo is. Lower Contrast for less shadows/darkness and lower Highlights if there are some white areas that are overexposed. I then raise the Shadows and Whites to have a brightly lit photo. Now if your pictures start to look flat, lower the Blacks and you will gain more depth.
3. Color:
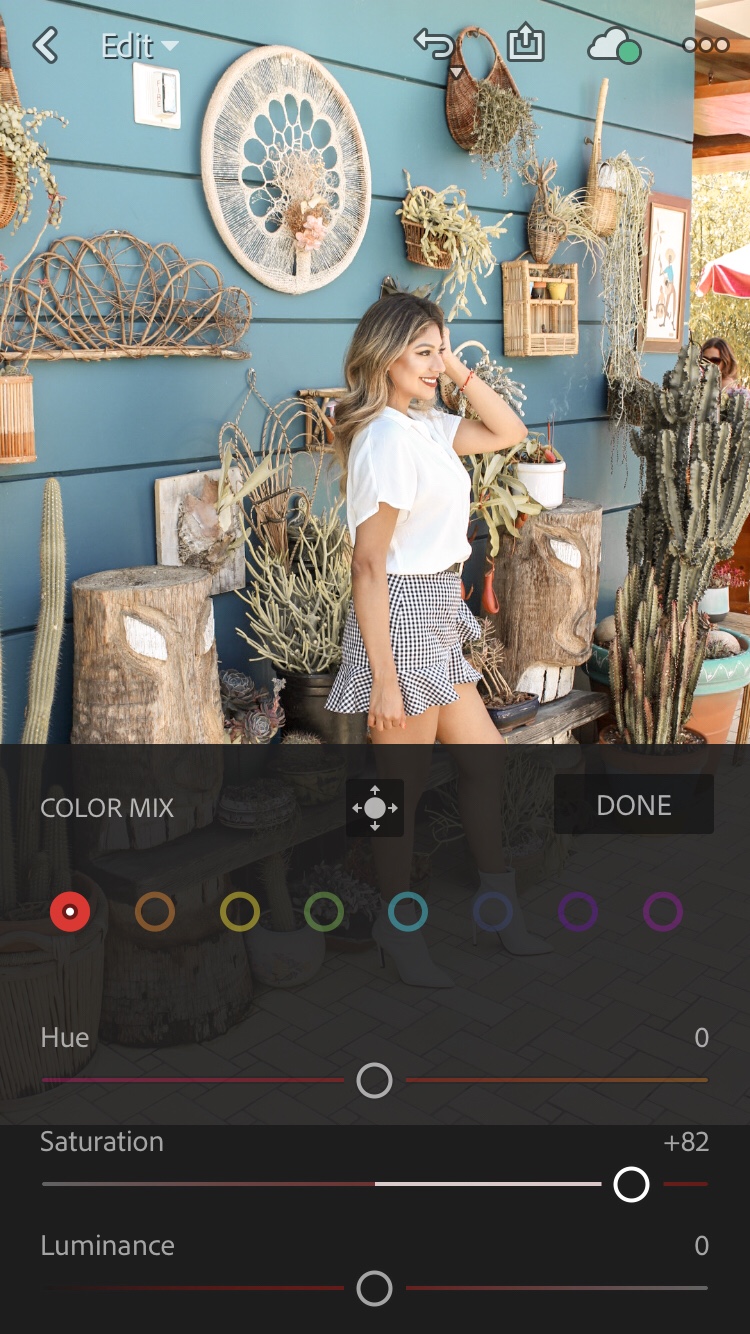
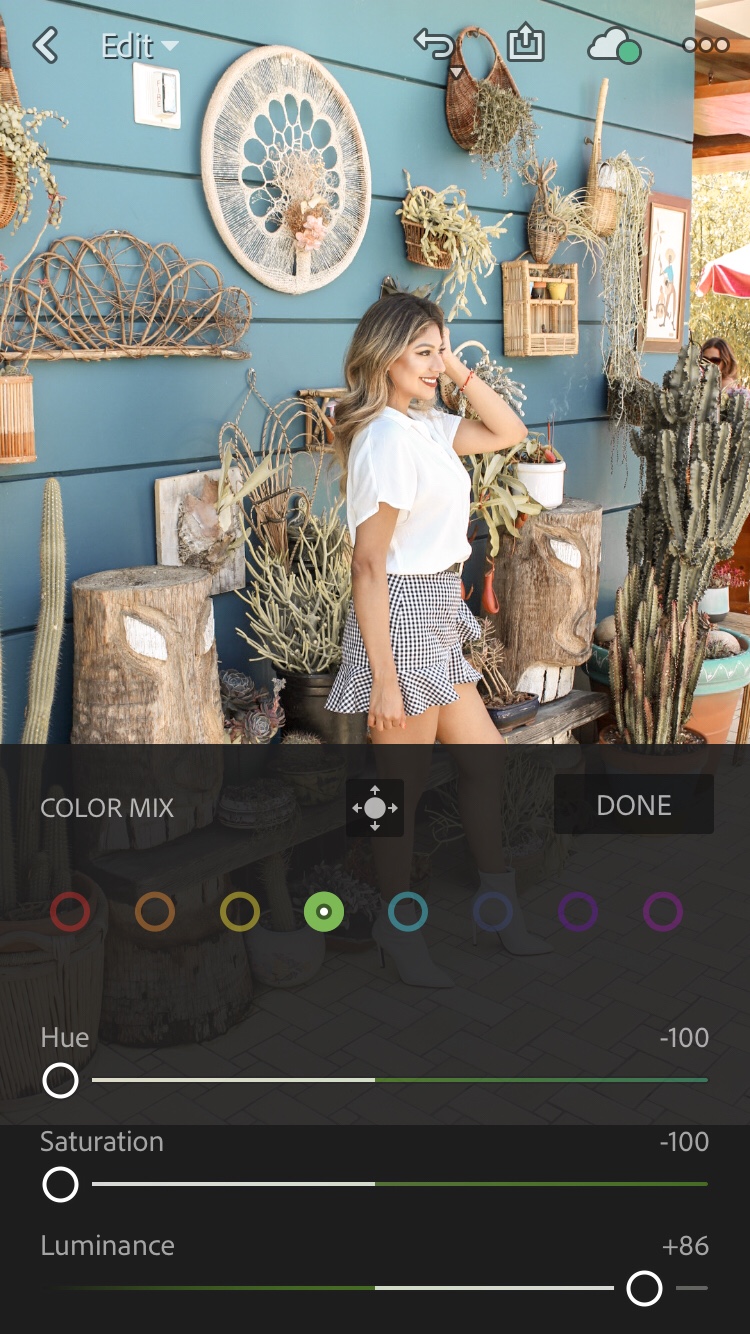
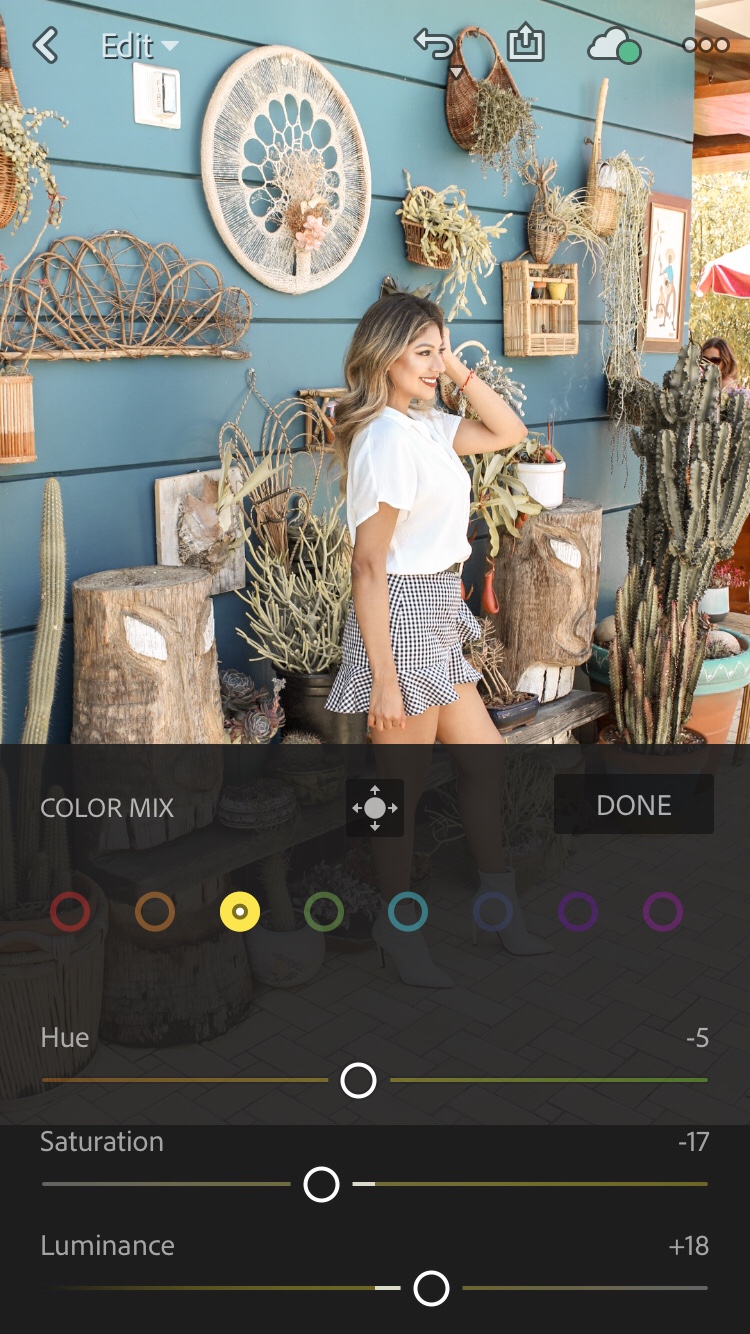
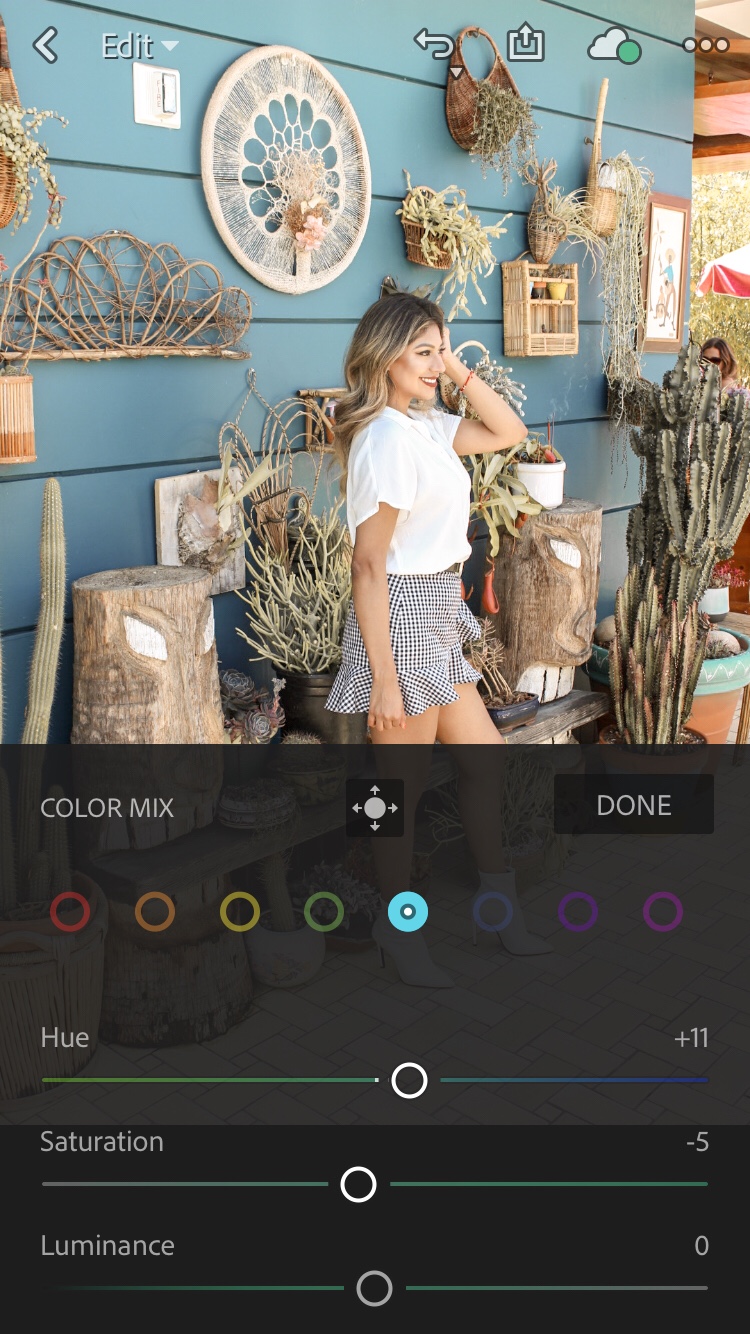
Here is where all the fun starts. I first start by muting the bright colors I do not want which are usually greens, yellows, oranges, and reds. In the Color Mix you have 3 options Hue, Saturation and Luminance. Hue will give you a warm and cool tone option. Saturation lowers the amount of color used in the overall picture. Luminance will make a color brighter or more dim. For my greens I like to lower the Hue and Saturation and raise the Luminance as it gives me a muted/pale warm tone dessert green as I like to call it. You’re half way done to learning how to edit pictures like a pro blogger.
4. Color – Temp:
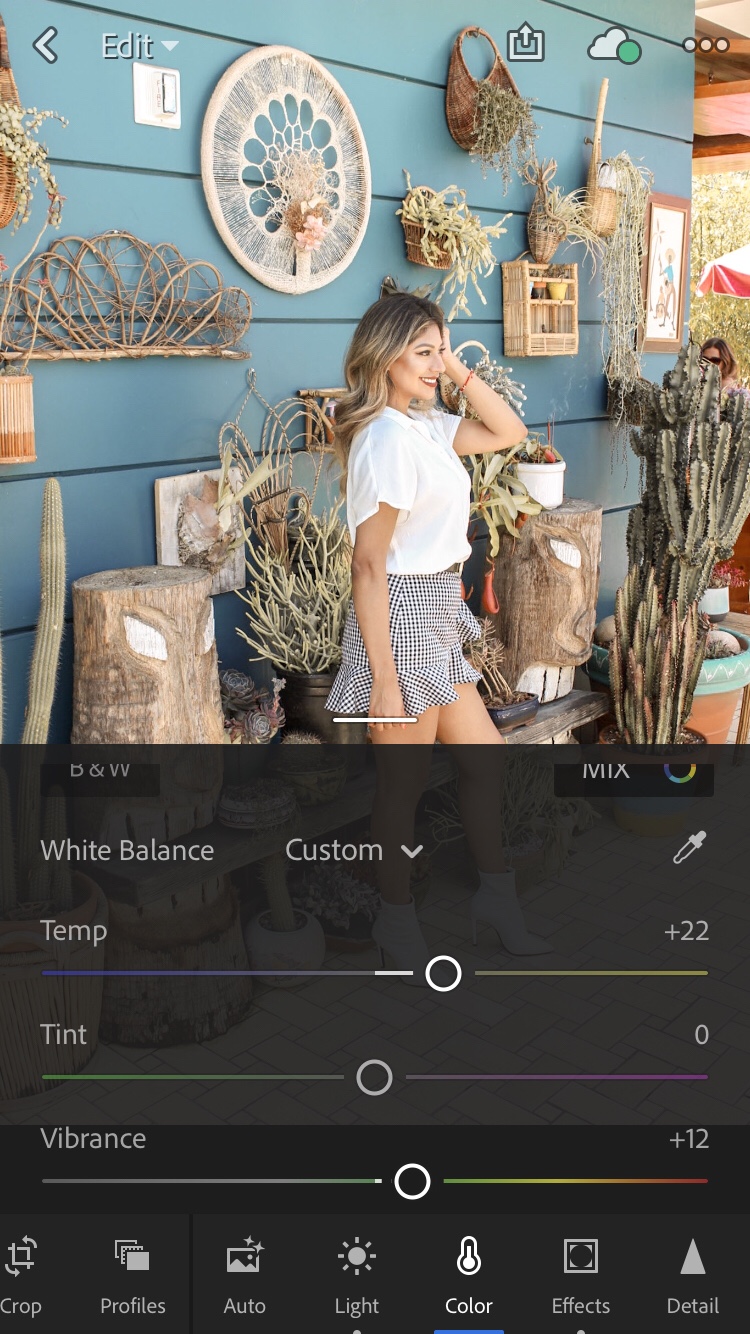
After I edit the colors and have the ideal color palette done, I like to add warmth to the picture as a last step. Since I have an olive tan skin tone and blonde hair, the level of warmth needed isn’t a lot so I raise the Temp anywhere from 5-15 points but no more than 20. Ever. Hahah don’t want to look like an oompah loompa. Of course this changes for everyone based on location, lighting, colors presented in photo and your skin tone and hair color. There are many things to consider when you want to edit your pictures like a pro and have a cohesive theme.
5. Effects (optional):
Here is where you will find the very popular Grain option/filter that many beauty and fashion bloggers use on selfies for a Photoshop finish and style photos to give it more character. To my surprise, not many of my friends knew this “filter” was actually the Grain option. You will also find Clarity used to add structure and define your photo if slightly blurry without using the Sharpening tool which tends to pixelate your photos when you export.
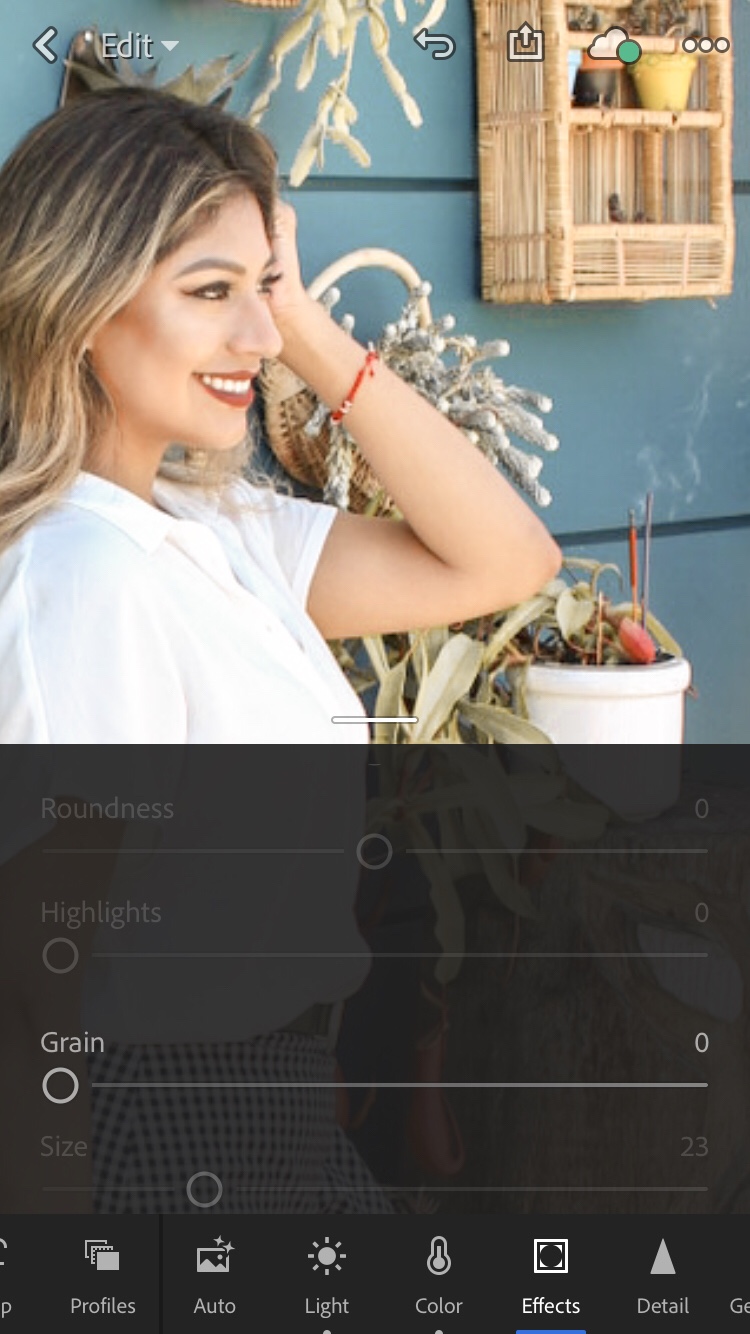
Without Grain
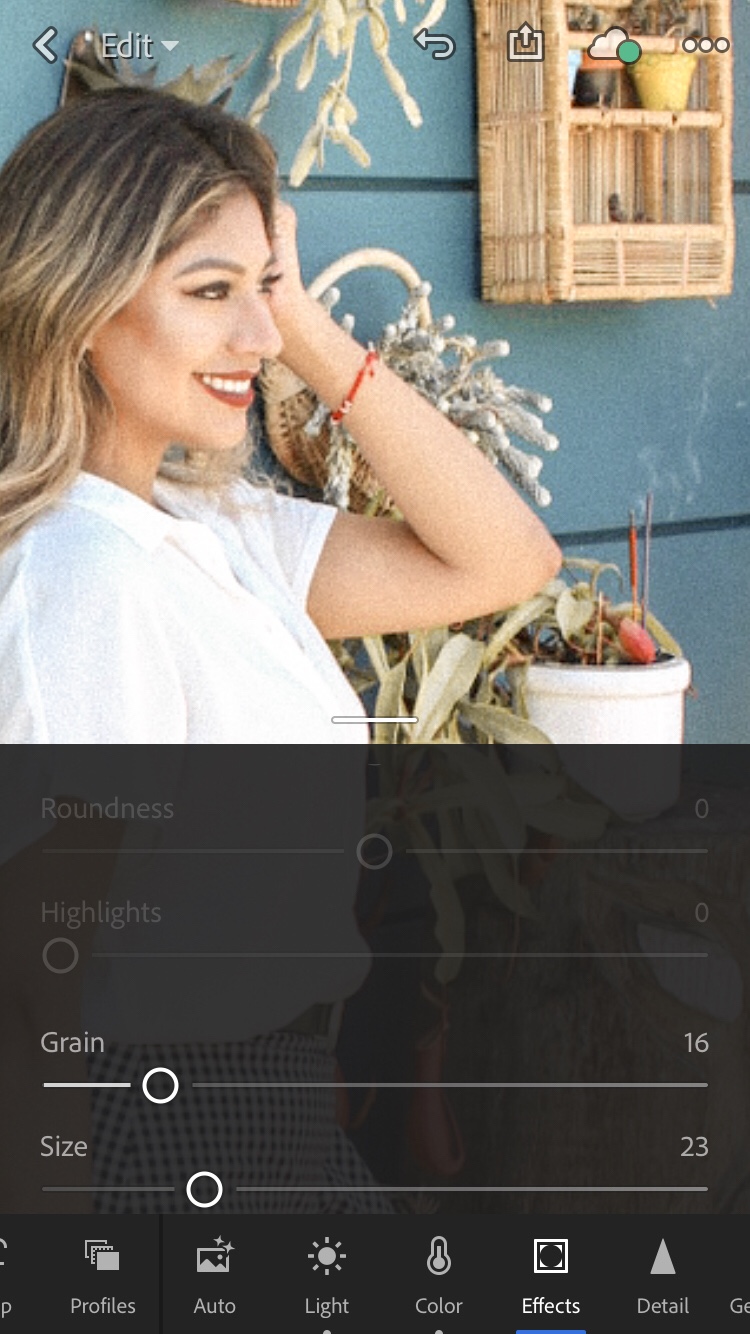
With Grain
6: Copy & Paste:
Once you are truly happy with the edits you have made to your picture, you are then able to copy those same edits and paste the settings to as many other pictures as you want. But please note, each picture will look different if the lighting is different. If one picture if overexposed, it will not look the same as a well-light and balanced picture. It is important to know this. It is important to tweak each picture individually if there are slight differences. You may have a picture requires more contrast vs highlight. Overall, once you play with Lightroom app, you will learn very easily and quickly how to edit your pictures like a pro.
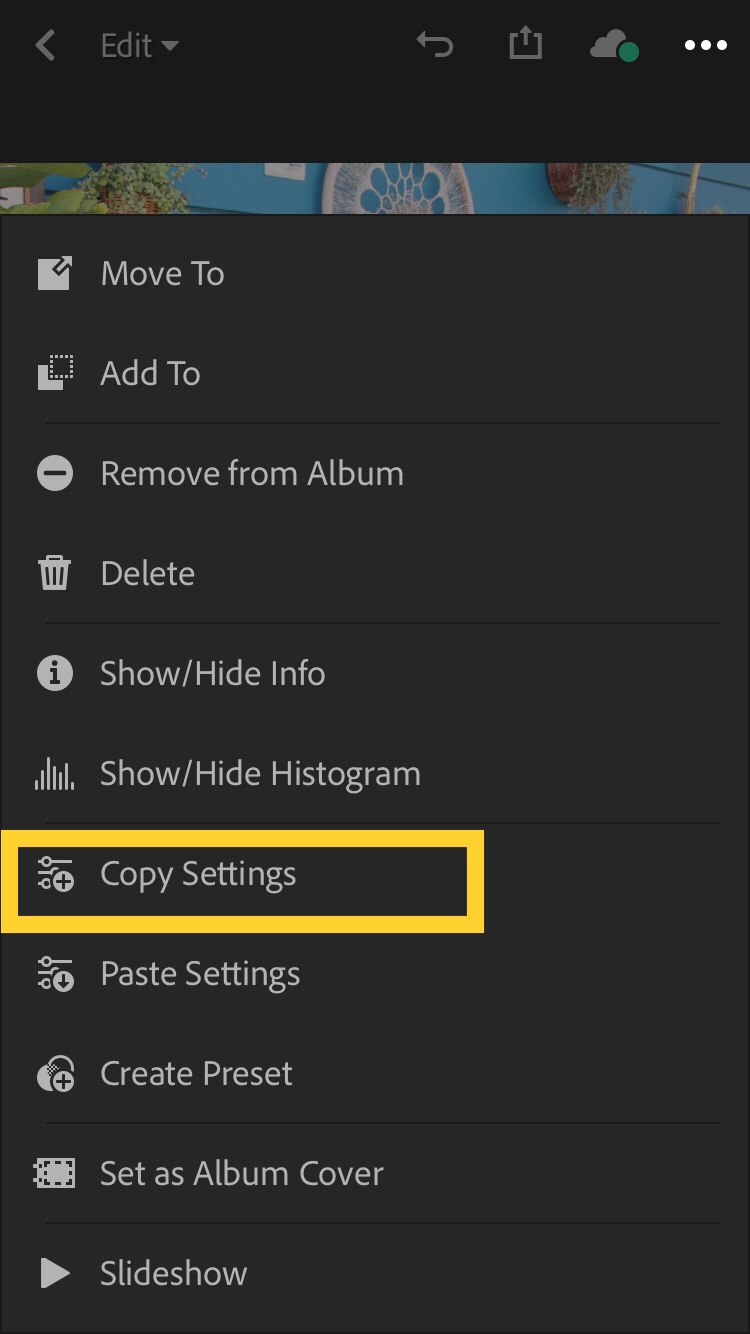
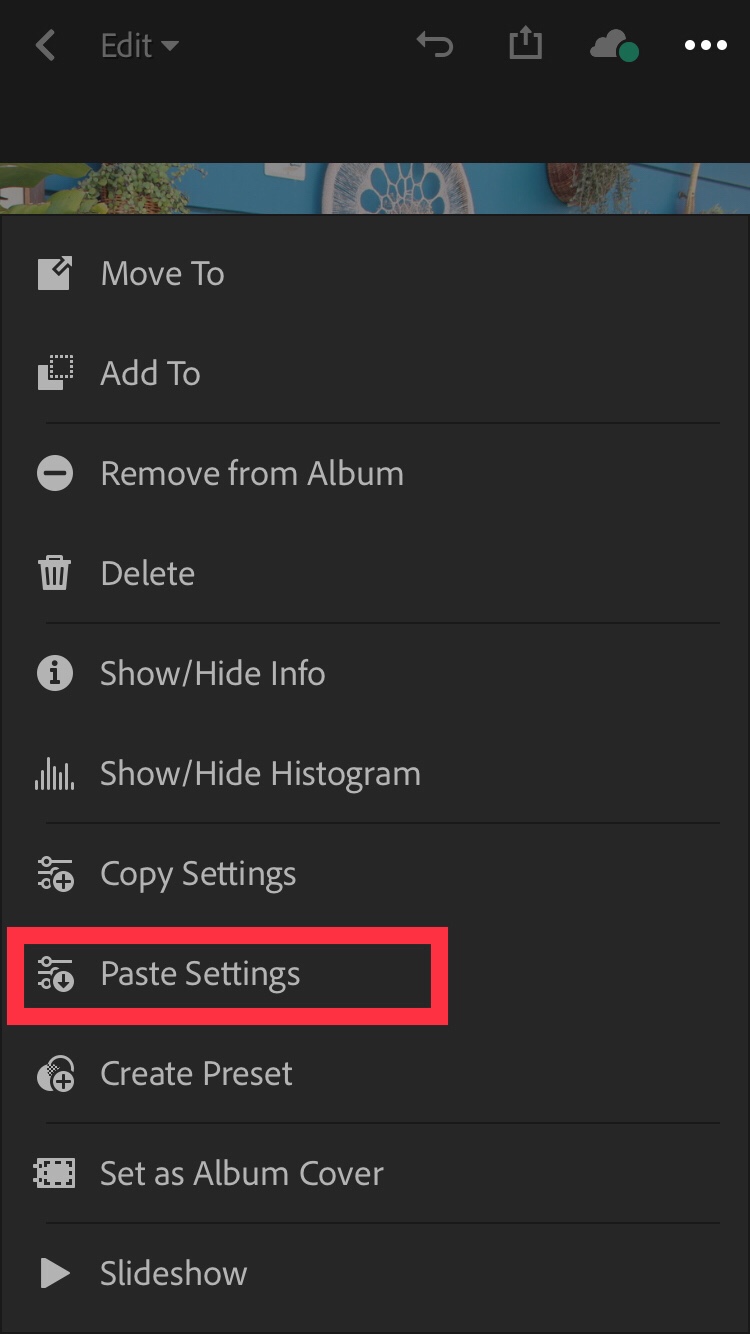
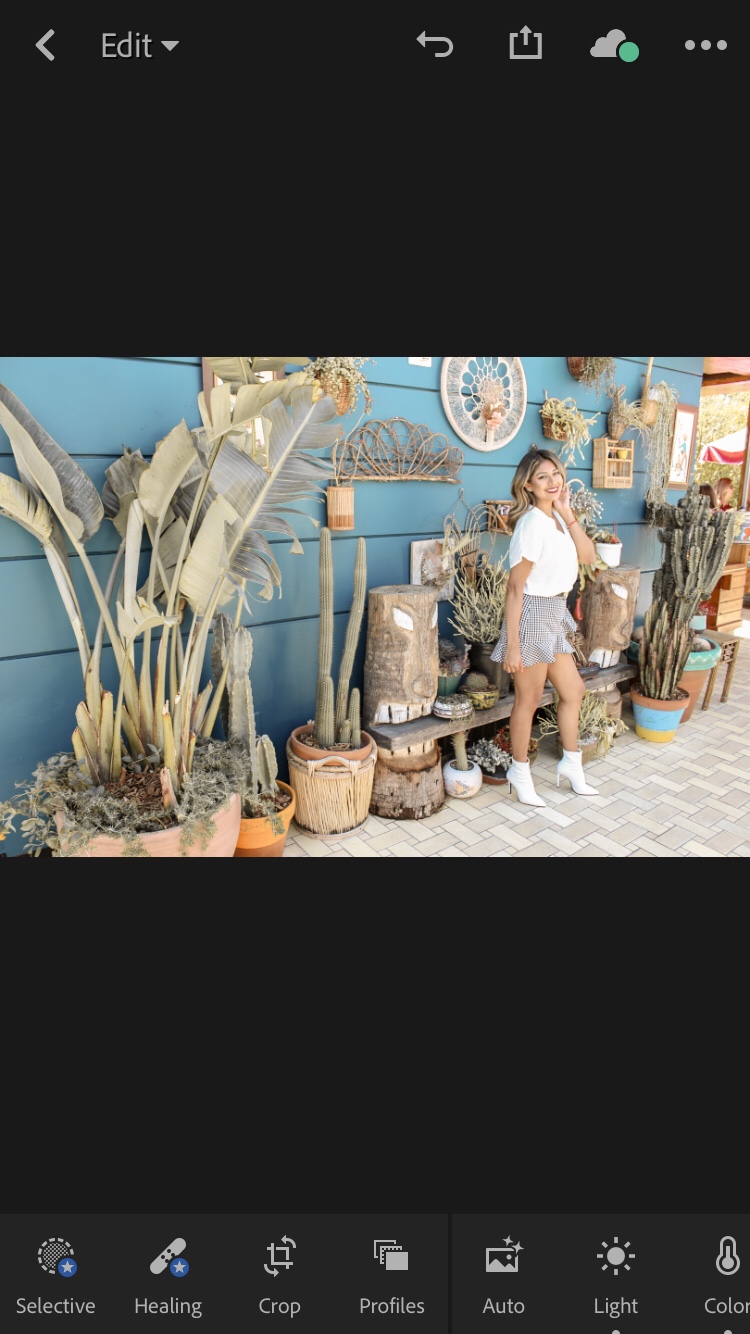
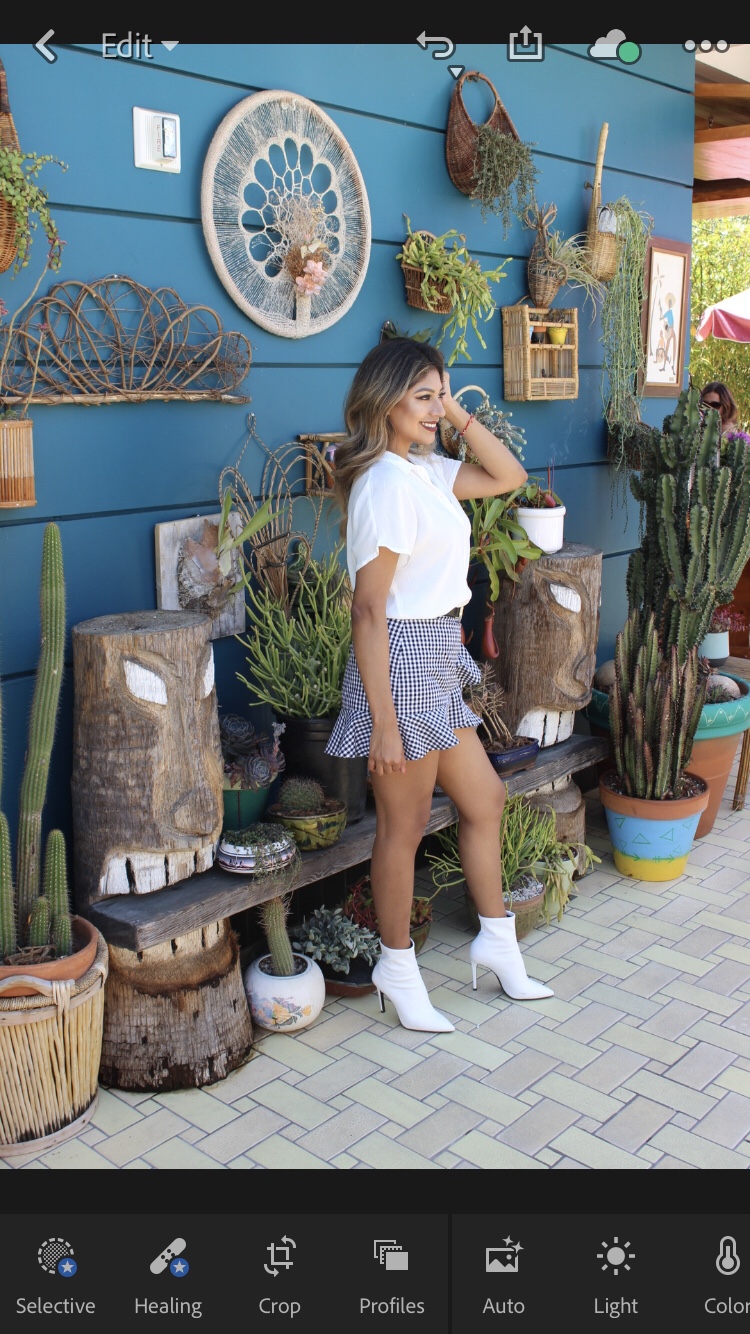
There You Have it, 6 Steps to Edit Pictures Like a Pro
It is important to understand, lighting is very crucial to editing photos on Lightroom. Although you took the same picture at the same time, depending on lighting, the copy and paste factor might result in a slightly different tone photo. That’s why its important to tweak each photo accordingly. If this app seems too complicated, remember there are many Instagram photo editing apps available in order to to edit pictures like a pro blogger. I hope you can use this information and test these edits/filters on some of your own photos.
Do you currently use Lightroom CC? If not, which app do you use?
XO Andie
I edit most of my photos on lightroom cc on pc. Needless to say lightroom is very powerful yet simple tool for color grading photos. I Never thought lightroom for mobile is this good, always thought it would be sloppy. After reading this post i guess i should give it a shot.
Author
YES!! I actually didn’t even know there was a mobile version either. I use most Adobe applications on my Mac as well. They are amazing but the mobile Lightroom definitely does not get enough credit. Glad I was able to bring it to your attention.
Loved reading this! I just started using Lightroom not too long ago & I love getting all the tips/tricks!!
Author
Thank you for reading! I am glad my post was informative and useful to you 🙂 XO
I love the Lightroom app when I’m on the go and need to edit before I get back to my computer!
Author
YESS!! It’s become my go to also!
I ALSO love Lightroom too! For months, I refused to buy it but then when I finally caved in – I realized I was missing out! hahaha If you take lots of photos-it’s TOTALLY worth it. <3
But you know, they updated it FINALLY! So now you can actually create PRESETS on your computer and then it will transfer over to your phone as well! <3 So this way, you can keep the same look on several pictures without copying and pasting the settings (which is what I used to do too). So definitely explore that as well!
This was an excellent blog girl! It was so detailed and clear! <3 Thanks for sharing it!
Author
Omg hahha I used to be the same way. Never wanted to invest on apps but you are totally right. If you take lots of photos it worth buying and upgrading apps. I will need to look into creating Presets on the mobile app. I know you can do it on the Desktop/MAC version! So I will need to connect mine and have the same filter for mobile and MAC. Thanks for the tip and I am glad to hear you enjoyed my post 😀 <3